Indoor brick walls add warmth, texture, and character to a room, but they can also collect dust, soot, grease, and moisture over time. Unlike painted walls or tiles, brick is porous. This means it can absorb water and cleaning products quickly, making the wrong method more likely to cause stains, surface damage, or weakened mortar.
Safe cleaning starts with understanding the wall’s condition. Modern feature brickwork may tolerate gentle washing, while old handmade bricks and lime mortar require a far more cautious approach. The following guide explains how to clean interior brickwork without damaging its appearance or structure.
Inspect the Brickwork Before Cleaning
Before using water or chemicals, examine the entire wall carefully. Cleaning an unstable surface can make existing defects worse and may create expensive repair work.
Look for Damage and Weak Mortar
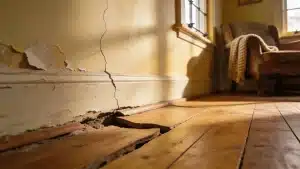
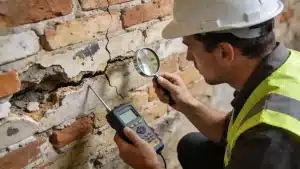
Check the brick faces and joints for cracks, crumbling mortar, loose sections, flaking surfaces, and powdery material. Run a dry cloth gently across several areas. If brick or mortar dust comes away easily, avoid scrubbing until the wall has been professionally assessed.
Pay close attention to older walls. Traditional brickwork often contains softer materials that can be damaged by stiff brushes, strong detergents, or repeated wetting. The aim is to remove unwanted dirt without wearing away the original surface.
Check for Damp and Salt Deposits
Dark patches, musty smells, peeling paint, and white powder can point to moisture inside the wall. White crystalline marks are often efflorescence, which forms when water travels through the masonry and leaves mineral salts behind.
Cleaning these marks will not provide a lasting result if the source of moisture remains. Leaking pipes, defective pointing, blocked gutters, condensation, or roof problems may need to be repaired first.
Prepare the Room Before You Begin
Indoor brick cleaning can create dust, dirty water, and loose debris. Careful preparation protects surrounding surfaces and makes the process easier to control.
Clear and Cover the Working Area
Move furniture, curtains, rugs, pictures, and decorative items away from the wall. Cover the floor with waterproof sheeting and place absorbent towels along the base to catch drips.
Protect skirting boards, electrical sockets, switches, and nearby painted walls. Moisture should never be allowed to enter electrical fittings or collect behind timber finishes.
Improve Ventilation and Wear Protection
Open windows and doors before cleaning. Good airflow helps control fumes and allows the brickwork to dry more evenly.
Wear protective gloves and safety glasses, even when using a mild product. Masonry dust and cleaning solutions can irritate the skin and eyes. Never mix different chemicals, as some combinations can release dangerous gases.
Remove Loose Dust Before Wet Cleaning
Dry cleaning should always be the first stage. In many cases, a large amount of visible dirt can be removed without introducing moisture.
Vacuum the Surface Carefully
Use a vacuum cleaner with a soft brush attachment and work from the top of the wall downward. Move slowly across the brick faces, joints, ledges, and uneven sections where dust tends to collect.
Avoid pushing the attachment firmly against fragile mortar. If the joints look weak, hold the nozzle slightly away from the surface while using a soft hand brush to loosen debris.
Brush Deep Joints Gently
A soft nylon or natural-bristle brush can help remove dirt trapped inside recessed mortar lines. Use light movements rather than aggressive scrubbing.
Vacuum the floor and surrounding surfaces after brushing. Removing dry debris prevents it from turning into muddy streaks once water is applied.
Test Every Cleaning Product First
Brick varies in colour, porosity, age, and condition. A cleaner that works well on one wall may stain or damage another.
Choose a Hidden Test Area
Select a small section behind furniture or near a lower corner. Apply the intended cleaning method to that area, including rinsing and drying.
Do not judge the result while the brick is wet because damp masonry naturally appears darker. Wait until the test patch has dried completely before checking for discolouration, streaking, white residue, surface roughness, or mortar loss.
Stop if the Surface Changes
Do not continue if the test area becomes lighter, darker, shiny, rough, or powdery. These changes suggest that the product or cleaning method is unsuitable.
A failed test should not be followed by a stronger product. The wall may require a different treatment or professional investigation.
Choose a Gentle Cleaning Solution
For general household dirt, a mild solution is usually safer than a specialist chemical. Stronger products should be reserved for specific stains and used only after testing.
Use a Mild Neutral Detergent
Mix a small amount of pH-neutral detergent with warm water. The solution should be weak and should not produce large amounts of foam.
Too much detergent can leave a sticky film that attracts dust. It can also be difficult to remove from porous masonry. Always begin with the lowest practical concentration.
Avoid Harsh Household Products
Vinegar and lemon juice are acidic and may react with mortar or minerals inside the brick. Bleach may lighten the surface or leave uneven patches. Strong acid-based masonry cleaners can damage both brick faces and joints when used incorrectly.
Do not assume a natural or commonly used household product is safe for every wall. Brick cleaning should be based on the material, not on general cleaning advice.
Clean the Wall in Small Sections
Working gradually gives you better control over moisture, dirt, and drying. It also allows you to stop quickly if the surface reacts badly.
Lightly Dampen the Brick
Use a clean sponge to apply a small amount of water to the section you are about to clean. The brick should feel damp rather than soaked.
Pre-wetting can reduce the amount of cleaner absorbed into the pores. However, excessive water may travel deep into the wall and take a long time to evaporate indoors.
Apply the Cleaning Mixture
Spread the mild solution over the damp section with a sponge or soft brush. Work from the top downward so dirty liquid does not run across areas that have already been cleaned.
Keep each working area manageable. Do not coat the entire wall at once, as the solution may dry unevenly or leave streaks.
Scrub Without Excessive Pressure
Use a soft or medium nylon brush and make gentle circular movements. Follow the texture of the brick and take extra care around mortar joints.
If the dirt does not lift immediately, repeat the mild treatment. Several controlled applications are safer than one forceful attempt. Stop if the brick starts to flake, crumble, or change colour.
Rinse with Minimal Water
Wipe the cleaned section with a fresh sponge dampened in clean water. Rinse the sponge regularly and replace the water when it becomes dirty.
Avoid spraying or pouring water directly onto the wall. Controlled wiping is more suitable indoors and reduces the risk of saturation.
Deal with Soot and Smoke Marks Carefully
Soot is difficult to remove because its fine particles can settle deep inside porous brick. Wet wiping at the wrong stage may spread the stain.
Begin with Dry Removal
Vacuum loose soot without rubbing it into the surface. A dry cleaning sponge designed for smoke residue may help lift light carbon marks without using water.
Work slowly and replace the sponge when it becomes heavily soiled. Continuing with a dirty sponge may transfer soot back onto the wall.
Use a Suitable Masonry Cleaner
Heavy soot may require a product designed specifically for smoke staining on brick. Test it first because some cleaners can noticeably lighten the masonry.
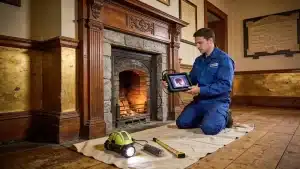
If soot returns after cleaning, the fireplace, chimney, or flue may need inspection. Repeated staining can indicate a ventilation or combustion problem.
Treat Grease and Paint as Separate Problems
Different stains require different solutions. Using one product across the entire wall may spread the contamination or create uneven colour.
Remove Greasy Deposits
Brickwork near kitchens may develop dark patches from cooking oils. Blot fresh grease with an absorbent cloth rather than rubbing it into the pores.
A masonry-safe degreaser may be needed for older stains. Apply it only to the affected area and follow the manufacturer’s instructions carefully. Deep grease may require several mild treatments.
Handle Paint Marks with Care
Fresh water-based paint may be softened and lifted gently before it cures. Dried paint often requires specialist removal.
Do not use wire brushes, metal scrapers, or sanding tools. These methods can remove the brick’s outer face while leaving paint trapped inside the pores. Large painted areas are usually better handled by a restoration specialist.
Remove Efflorescence Without Adding More Moisture
White deposits on brick are often mistaken for mould. Efflorescence is a mineral residue linked to moisture movement through the wall.
Brush the Wall When It Is Dry
Allow the masonry to dry fully, then use a clean, soft brush to loosen the white powder. Vacuum the residue immediately so it does not settle elsewhere.
Avoid washing the deposits repeatedly. Water may dissolve the salts and carry them deeper into the brick before they return to the surface.
Investigate the Source
Recurring efflorescence means moisture is still moving through the masonry. Check for defective gutters, damaged pointing, plumbing leaks, roof faults, poor ventilation, or damp entering from outside.
The deposits may disappear temporarily after cleaning, but they will continue to return until the underlying moisture problem is corrected.
Take Extra Care with Painted and Historic Brick
Painted and period brickwork needs a different approach from stable modern masonry.
Clean Painted Brick as a Decorated Surface
Use a soft sponge and mild detergent. Avoid stiff brushes that may scratch or polish the coating.
Stop if the paint softens, blisters, or peels. These symptoms may indicate trapped moisture, poor adhesion, or an incompatible coating.
Protect Traditional Materials
Historic walls may contain handmade bricks, lime mortar, and aged finishes. Pressure washing, sandblasting, strong acids, and hard mechanical tools can permanently damage these materials.
The safest goal is not always to make old brick look new. Natural colour variation and age-related marks may form part of the building’s character.
Professional Indoor Brick Cleaning by Environ Restoration Services
Indoor brickwork can be difficult to clean without affecting its colour, texture, or mortar joints. Environ Restoration Services provides professional brick cleaning and restoration for homes, commercial buildings, and heritage properties across London.
Careful Cleaning Based on the Condition of Your Brickwork
We begin by examining the brick type, mortar condition, staining, moisture levels, and any previous coatings. This helps us choose a cleaning method that improves the surface without using unnecessary pressure, water, or harsh chemicals.
Our team can help with soot, paint residue, dirt, salt deposits, and other marks that are difficult to remove safely. Where the wall also shows signs of damp, damaged pointing, or deteriorating brickwork, we can identify these concerns before cleaning begins.
Restore Your Interior Brickwork with Confidence
Our goal is to clean and protect the original character of your brickwork rather than make it look artificially new. We use controlled techniques suited to the age and condition of the property.
If your indoor brick wall is heavily stained, fragile, painted, or part of a period building, contact Environ Restoration Services to arrange a professional assessment and discuss the most appropriate treatment.
Frequently Asked Questions
What is the safest way to clean an indoor brick wall?
Begin by removing loose dust with a vacuum and soft brush attachment. Test a mild, pH-neutral detergent on a hidden area before cleaning small sections with limited water. Avoid wire brushes, strong acids, and excessive scrubbing, as these can damage the brick face and mortar.
Can I use vinegar to clean exposed brick indoors?
Vinegar is acidic and may react with certain bricks, lime mortar, or mineral deposits. It can also create uneven colour changes. A mild neutral detergent is usually a safer starting point, although every product should be tested before wider application.
Why do white marks keep returning after cleaning?
White powder is often efflorescence caused by moisture carrying salts through the masonry. Cleaning may remove the visible deposits temporarily, but they can return if the source of moisture is not repaired. Check for leaks, condensation, damaged pointing, or external water penetration.
When should I hire a professional brick cleaner?
Professional help is recommended when brickwork is historic, heavily stained, painted, damp, or deteriorating. You should also seek expert advice if the mortar is crumbling, mould keeps returning, or previous cleaning attempts have caused discolouration or surface damage.